Friday, October 11, 2013

Forty Pounds of Chicken


I placed my first order from Zaycon Foods and the pick up was this morning. I only ordered one case since I don't have an extra freezer. I was very happy with my chicken and will order from them again. Since I don't have a freezer and I am out of canning jars, my MIL offered to let me keep my chicken at their house. I was able to get it all vacuumed sealed and in her freezer this morning.

I think that will last us for a while!

Monday, October 7, 2013

Taco Seasoning

I have been making my own taco seasoning for a while now, even before I started trying to make as much as I could from scratch. I like to add it to other ingredients sometimes and would often only need a small amount from a package, then would have a package that wasn't enough to make tacos, and then it would get stuck in a drawer and I would forget about it until I cleaned out the drawer.

One day I was making tacos and realized that I didn't have any taco seasoning and didn't want to run to the store either. Google to the rescue! I searched for a recipe and found one, made it and loved it. I have tweaked and added to that original recipe and have some up with this version that I really like.


This recipe does make quite a bit, but I like to have it on hand, so once I have filled my spice container (like the ones above), I put the excess in a mason jar and vacuum seal it so that it stays fresh. 

You can also see my high tech way of labeling jars--I use painter's tape to write the contents and the date on the jars.


Taco Seasoning

1/2 cup chili powder
2 teaspoons garlic powder
3 teaspoons onion powder
2 teaspoons crushed red pepper flakes
2 teaspoons oregano
1 tablespoon paprika
1 teaspoon smoked paprika
1/4 cup cumin
1 tablespoon sea salt
3 tablespoons black pepper 
1 tablespoon cornstarch
1 tablespoon chipotle chili pepper
2 teaspoons beef bullion

Measure all ingredients into a bowl and mix well. Store in an air tight container.

To Use: When I use this for tacos, I add 3-4 tablespoons to a pound of ground beef that has been cooked and drained. Simmer seasoning mix, ground beef and 2/3 cup of water for a few minutes.


Other ways I use taco seasoning:
Salad Dressing: Add a teaspoons or two to ranch dressing for a southwestern ranch
Dip: Mix a couple of tablespoons to about a cup and a half of sour cream
Chicken: Sprinkle on chicken breasts before baking
Soup: Add some to a tomato based soup for a taco soup

I have lots of ways of using this seasoning, it is probably the seasoning mix that I use the most so even though it seems like a lot of mix, I go through it pretty quickly. 

Enjoy!

Friday, October 4, 2013

CSA Basket


Not the best photo, but the batteries in my camera are dead so I took a picture with my phone. This week's basket included lettuce mix, various squashes, some peppers, onion, green beans yellow beans, broccoli, cabbage and some greens that I already have in the sink to be washed,. 

I was happy to see that broccoli!

Have a great weekend!

Wednesday, October 2, 2013

Flavored Oatmeal

I am a old fashioned oats oatmeal eater. I married a flavored, instant oatmeal man. 

He would eat it when I made it but he didn't really enjoy it. I liked adding dried fruit to my oatmeal, but couldn't handle the texture and the sweetness of instant oatmeal. 

Ahhh, the internet! I went searching for some quick oatmeal ideas that would suit both of us. I found several versions of "do it yourself" instant oatmeal packs so I decided to give it a try.

I started with 10 cups of oats, a cup and a half of brown sugar, a cup of powdered milk, and a couple of teaspoons of cinnamon.


Half of the oats went into the food processor and I hit the pulse button a few times to break it down and then added the remaining ingredients and mixed them all together to form my oatmeal base.


At this point, I pulled out a bunch of fruits that I had dehydrated, some nuts and some other seasonings. I measured  about 1/2 a cup of the oatmeal base into a jelly jar (you could do this in plastic bags, but I like vacuum sealing these in jars). I prefer the jars because they last longer and they are easier to deal with in my pantry that is full of other mason jars.


I added about a tablespoon of nuts if I was using them, and a couple of tablespoons of the fruit. Spices were added in 1/4 tsp increments.

These are the varieties that I made and the additions:

Apple Cinnamon--I added an extra 1/4 tsp of cinnamon, and some chopped pieces of apples that I had dehydrated.
Apple Pie--a little cinnamon, some apples, a little nutmeg, golden raisons, and a small amount of walnuts.
Brown Sugar and Cinnamon--a little extra cinnamon and a little more brown sugar.
Strawberries and Cream--an extra 1/2 teaspoon of powdered milk, some dehydrated strawberries.
Cranberry Almond--some dried cranberries and slivered almonds.
Pumpkin Spice--pumpkin powder (dehydrated pumpkin ground into a powder) and pumpkin pie spice.
Banana Nut--Chopped up dried bananas, a touch more cinnamon and some walnuts.

We have both tested most of the flavors and have pretty much been pleased. I made a couple of notes to change for the next time, the biggest being to make sure I added enough of the pumpkin powder in the Pumpkin Spice--you could taste it but is was very subtle. 

When I do things like this, I make a ton of them so that I don't have to do then that often--I doubled this recipe so I have about 35-40 jars of oatmeal vacuumed sealed in my pantry. They make a great quick breakfast and can be tossed in a lunch box for a snack or breakfast at our desks at work.

I love that these have real fruit in them, I can control the sugar, it has a heartier texture for me than commercial packets, but a smooth enough texture for my husband. Pretty much a very tasty win-win!

Monday, September 30, 2013

Homemade Granola


I have always really liked granola and if I am ever in a store with bulk bins with several flavors, I will normally get a sampling of each flavor. I knew I could make it at home, but I thought it was probably a lot of trouble. I was very happy to discover that I was wrong! Nothing that I have ever bought in any store matched the taste in that first batch of granola that I made. Even though I burned it a little, I could taste the reason that people make their own granola.

I haven't bought granola in a store since.

Normally when I make granola, I make what I call "kitchen sink" granola. It really is just a mix of whatever I happen to have on hand that I think will taste good in the granola.

My ingredients for this batch included dried apples, pecans, brown sugar, oats, coconut, honey and dried cranberries. You can also see in the brown sugar canister that I accidentally combined some dark brown sugar with some light brown. Normally I only buy the light brown and just add extra molasses when I need the dark brown.


After mixing all of my ingredients, I spread the mixture out on a large cookie pan.


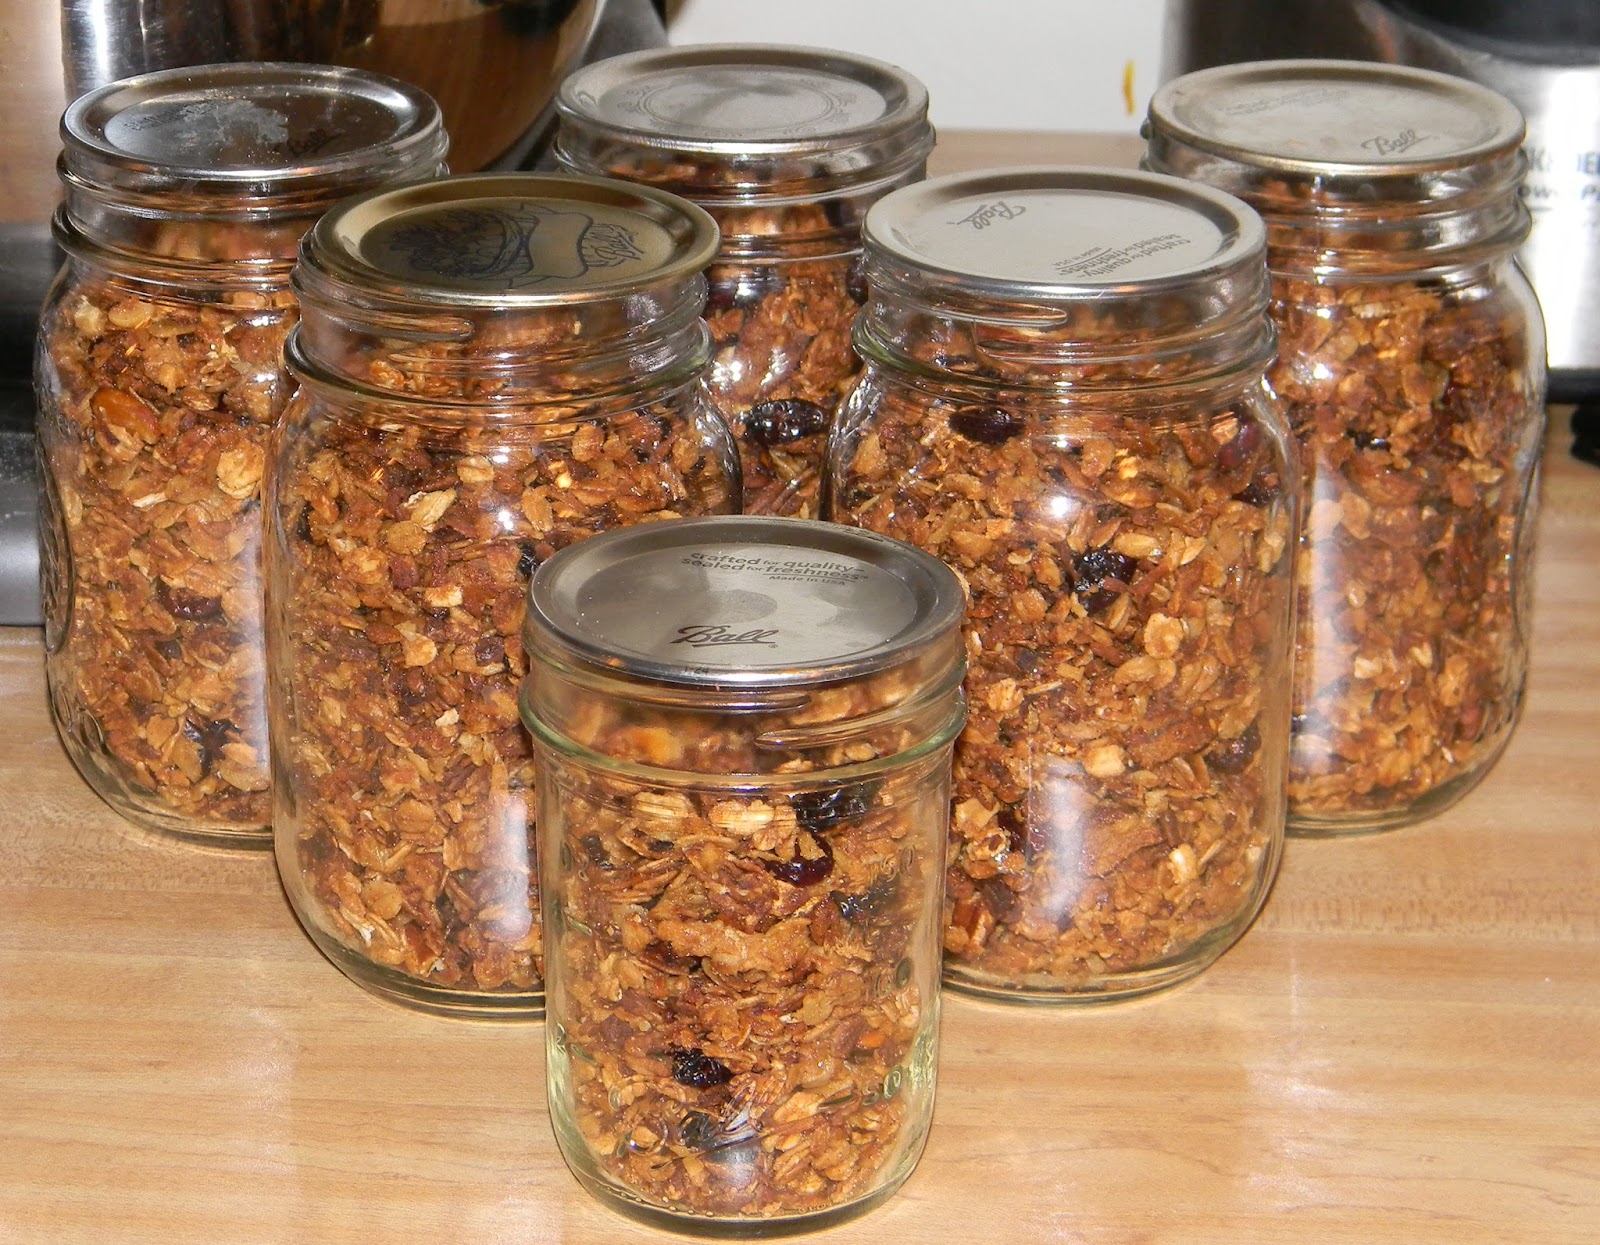
After it bakes and cools, I pour it into mason jars and vacuum seal so it will stay fresh longer.


There are so many variations on the basic recipe, you can really do almost any taste combination that you like. Here is my basic recipe:


Granola

5-6 cups Old Fashioned Oatmeal

1/2 cup of oil ( I usually use coconut )
1/2 cup of sugar ( any kind, here I used brown sugar)
1/2 cup of honey (or maple syrup or molasses
2 heaping tablespoons of seasoning (I used cinnamon in the batch, but you can play around with pumpkin pie spice, nutmeg, pumpkin powder, cocoa powder whatever you think might taste good)

Add in ideas: any dried fruit or berries, nuts, coconut, chocolate chips, peanut butter chips,etc

Measure out the oatmeal in a large bowl. In a smaller bowl combine oil, sugar, honey and cinnamon and mix well. Pour this mixture over the oats and stir until all the oats are covered. If the oat mixture looks too wet, I will add a little more oats.

At this point you can add your add in items, excluding anything that might melt. I have seen some recipes that add everything after it cooks, but I like to add them and bake them with the oats.

Spread mixture onto a cookie sheet and bake in a 350 degree oven for about an hour, stirring every 15 minutes.

Remove from the oven and let cool. If you are using an ingredient that might have melted, you can add it now. Store in an airtight container.

Wednesday, September 25, 2013

Garlic Shrimp Po' Boys

I am always looking at new cookbooks, and used to buy them all the time. After a while I ran out of room and pared down my collection. I kept the ones that I have bought on vacations, all the ones that once belonged to my grandmother, and several others that I just really liked. I don't buy them very often anymore unless they are geared more to a specific interest. 

I have been reading a blog called Lunch Box Blues for quite some time. It is written by a father (J.M. Hirsch) and is about the lunches that he packs for his son. I started reading it when I was packing lunches a lot more often. I usually use dinner leftovers for lunches but don't really care to eat the exact same thing for several meals. Unless it is soup, I can eat soup three meals a day until it is gone. The blog is the same, he starts his son's lunches with last night's dinner, but often changes it around some so it doesn't feel like the exact same meal. 

Recently he released a book called Beating the Lunch Box Blues that I decided met all my criteria for adding a new cookbook to my shelf. There was a promotion that f you pre-ordered the book, you would also receive one of his other cookbooks. 

This recipe is from that book.

I started with the Broccoli Slaw mixture. I have never eaten broccoli slaw before, but I loved it and will be buying it more often, I really liked the crunch.


All I can say about this slaw is YUM!


The recipe called for half a pepper. When I went to the store, the pepper selection was nonexistent. Normally there are several baskets to choose from a variety of different types. That day there were two or three lonely, small, red jalapeno peppers.


Final dinner plate:


How was it? Pretty good. I would have liked to use the pepper that the recipe called for and I wish the one I bought hadn't been so wimpy, it barely had any flavor at all. Other than the tasteless pepper the flavor was great and it was a pretty quick recipe to get on the table. A better pepper would have added just the right touch of heat and flavor. I will make it again, and make sure I have a good pepper. We both loved the slaw topping. It's a keeper.


Here is more about the High Flavor Low Labor cookbook. I have now tried three or four recipes from this book and it is staying on my shelf. One of the recipes I made was the one pictured on the cover and oh, my goodness, that was fabulous! 

Monday, September 23, 2013

Canning Together


I grew up in a gardening and preserving family, so I have been a part of multi-generational canning, prepping and preserving sessions. I remember sitting under the big tree at my grandparents home, breaking and string beans with my grandmother, aunt, mom and my great-grandmother. I bought a couple of cases of beans the other day to split with my sister-in-law and we planned a bean breaking and canning night. She brought her daughter, and my mother-in-law also joined us. I wish I had thought to get a picture of all of us working together to get the beans done, but I forgot. Working with three other sets of hands really made the time go by much faster. We also had two canners going instead of just one, so that we were able to process all 32 quarts of beans in half the time.

I have got to get better at working with two canners on the stove though, I keep burning my arm. Same arm and in about the same place. Actually at this point, I think I have branded myself, there are three marks on my arm that have been there for a while and do not seem to be going anywhere.  

It was fun working with everyone to get all the beans done. I am a big fan of multi-generational activities in pretty much all forms. I think everyone has something to learn in those situations, the oldest can learn from the youngest and the older and/or more experienced person can share so much wisdom that would otherwise be lost. I hear that all the time, especially about canning. When people find out I enjoy canning, they often comment about remembering  watching their moms, or more frequently, their grandmothers while they canned. And then is is followed by a statement that makes me sad "but I never learned how".  Hearing those words is even sadder when you hear the wistfulness and longing in their voices when they say them. Even worse is when they say that they never taught them. I asked my grandmother for years to teach me to crochet, but she never would. I finally taught myself and instead of being a fond reminder of my grandmother, there is no connection. I did however teach my friend's daughters to crochet some, so there are memories of passing on a skill, memories that make me smile, but no connection to my grandmother who loved to crochet. 

~~~~~~~~~~~~~~~~~~

How many skills and how much wisdom have been lost?


I used to attend a craft night once a month with some ladies from church. We had a core group of women that were there almost every month, the youngest was eight and the oldest was eighty five and the rest of us fell in there somewhere. Nothing made me happier than to see that little girl interacting with a woman old enough to be her great-grandmother. Most of the time it was the older woman instructing the younger, but there were times when the younger was able to teach the older. 

I firmly believe that both lives were all the richer for sharing those experiences.

Many years ago I was the director of a large child care center and somehow met a woman that was an activity director for an assisted living facility. Once a month she would bring a bus load of kids to my center, or alternately I would bring a bunch of kids to her center. We would plan activities for them to do together, games, art projects, just different things that would appeal to both generations. Sometimes when they would come to my center, they would enjoy just sitting and watching the kids play on the playground. It was a great program that we kept going for a long time. 

Again, how many skills and how much wisdom has been lost? If you have read this far, all I ask is that you remember to pass on your wisdom and skills. At times you will find yourself the teacher and at other times you will be the student. Be open when those opportunities present themselves. Whether you are taking time to teach or to learn, you are benefiting not only your life, but countless other lives as well.

Friday, September 20, 2013

CSA Box


It has been a little cooler here these past few days, I am seeing pumpkins and mums at the Farmer's Markets, and I am seeing Pumpkin Spiced coffee everywhere! I know that fall is coming and it is my favorite time of the year. With the coming of fall, I also realize that my CSA season will be ending soon. It has been a great season and I will be a little sad when it ends. 

This week we received green beans, basil, tomatoes, apples, summer squash, onion, red onion, potatoes, tender greens, purple hull peas, bell peppers and a patty pan squash.

What dill you miss most about summer produce coming to end? Tomatoes would top my list, tomatoes and peaches. And strawberries and other fruits. I do miss all those things when they aren't in season, but hopefully I have preserved enough of the summer's bounty to last me through the winter months.

Have a great weekend!

Wednesday, September 18, 2013

When Life Hands You Limes...


When life hands you limes....use every bit that you can! 

Another love that I seem to have gotten from my Dad is my love of limes. Love those things! I cook quite a bit with fresh citrus, using both the juice and the zest from lemons, limes and oranges. Often, I only need a small amount of zest. One day I was baking and only needed some zest and got the idea that I would start saving the zest from my citrus and dry the extra for those times that I only need the zest. I can easily find lemon and orange zest at the grocery store, but not lime zest.


I start by washing the lime very well and then letting it dry completely.

My zested lime:

I have found that these micro-plane grater work better than anything else that I have tried to use. I just rub the entire lime across the grater working over a bowl the entire time.
To dry the zest, I spread all the zest on a plate in a thin layer and let it dry on its own. It doesn't take that long and I just give it a stir every once in a while until it is completely dry. After that I store it in a spice jar and it is ready to use whenever I need it.


When I finish zesting the limes they look pretty naked, but that's okay since I will then juice them. 


Sometimes I am just zesting a lime or two for a specific recipe and I will also use most of the juice in the same recipe. 


Other times, I zest a bunch of limes at one time because I am wanting to make one of my favorite summertime drinks: 

LIMEADE!


Limeade

1 cup sugar
1 cup water

Make a simple syrup by adding the water and sugar to a medium saucepan and cook that until the sugar is completely dissolved.

1 cup lime juice
4 cups cold water

Combine the simple syrup, the lime juice and the cold water and stir to mix well. Pour over ice and enjoy.

***I like my limeade and lemonade to really pucker my lips so if I am making this for just me, I use about a cup and a half of the lime juice. 

Monday, September 16, 2013

Is Canning Cost Effective?


I get asked a lot if I save a lot of money by canning or if I am paying more for my food once you figure in costs of the food, plus the jars and other equipment. I have been carefully tracking my food purchases this year so that I can see what my savings amount to. I will use this one example of the carrots above: my local grocery store had bags of baby carrots on sale for .88, normally the bags are about $1.49 and occasionally go on sale for $1.00. I don't know why I only bought six bags, since I love carrots so much, but six was what I grabbed. Those six bags of carrots made 13 jars of baby carrots. Since I already had the jars, I did not add that cost, but I did use new lids which cost about .15 each (or less if I bought them on sale), the  liquid in the jars is water and I added a small amount of salt to each jar. So I figured that my pint jars of baby carrots cost me about .54 each. There is no where that I can get a can of carrots for that cost, especially the baby carrots.

That is just one example. It is a hard question to answer though and cost isn't my only reason for canning. I like knowing what is in the foods that I eat, I like that I can make things that are more tailored to our tastes and honestly, I really enjoy it. My goal in cutting costs is to buy as much as I can when the foods are at their peak, which often means they are at their cheapest. I try to buy enough to can to tie me over to the next season when it is at a lower cost. 

I have only had a pressure canner for a little over a year, so I am canning more things like soups and meat products too. I look at the weekly sale papers and plan recipes based on what happens to be on sale that week. For instance, when beef stew meat went on sale, I made a couple of batches of beef stew which will last me for a while.

I have bought more jars in the last couple of years, but I also have jars that I have probably had for about 15 years. As long as they are intact, with no chips, you can continue to use the jars year after year. I look for jars at yard sales and thrift stores to add to my collection too. 

Over the past year, I have noticed my grocery bill starting to slowly go down. Since I was able to do a lot more canning this year, I am hoping that trend continues. I have been buying a lot of produce this summer and canning as much as I can, so I think I will see my biggest savings as we go through winter and I have veggies and soups on hand, so that I am not buying those items in the stores.

Another huge cost saver is gardening. I don't grow enough to rely on that for my canning, but it does help save money. I do have time and some money invested in seeds and other gardening costs, but I do try and save seeds when I can and I make most of my own compost so that cuts down those costs as well. Playing in the dirt relaxes me so I don't mind the time involved. I am also lucky enough, usually to know people who often grow too much and are willing to share. 

I think the fairest answer to the question "does canning save you money" varies, depending on what item we are talking about. Making and canning my own spaghetti sauce probably costs me more that buying a jar at the store, but it also tastes much better so I am willing to pay a little more. Canning vegetables when the are in season gives me a better product and saves me money.

Friday, September 13, 2013

CSA Basket


The CSA season is still growing strong here, but I know it will be ending in the coming weeks and that makes me a little sad, I have enjoyed chatting with the other people at the pick up and of course have enjoyed eating all this yummy and super fresh food. Changing CSAs this year was a great decision for me, and I will continue with this farm next year. 

This week's box contained tomatoes, lettuce, okra, onion, green beans, squash, potatoes, a cantaloupe and for the first time, some apples. 

As far as my own gardening, I still  have some green beans growing on one of my plants, the others are done I think. I picked a HUGE bowl of cherry tomatoes the other day. Those plants really did well this year. I have several more green ones so I should have tomatoes over the next couple of weeks. 

Since Kip built my raised bed for my birthday, I have been able to grow more things here in my yard. I have really enjoyed watching everything grow too. My garden bed is at the end of my patio where I have a table and some chairs. I enjoy sitting out there in the mornings, enjoying a cup of coffee, looking at the changes in my plants and watching the birds fly in and out at the bird feeders.

I am going to get the bed cleaned out as soon as everything is done and I will be planting some cooler weather crops in the next week or so. After those are harvested, I am not sure if I will plant a cover crop or if I will be "trench composting" to prepare it for next season. Both are doable in a raised bed, but I haven't decided which method I will be using.

Have a great weekend!

Wednesday, September 11, 2013

Golden Mushroom Soup


One of my favorite ready to eat soups from a can is Golden Mushroom. I like the versatility of it; it is great eaten as a soup out of the can, makes a great simmer sauce for pork chops or chicken and works as a gravy on potatoes. As I have transitioned to eating less and less prepared foods to foods that I cook and/or can myself, I have missed that soup. 

One day I was reading one of the canning pages I follow on Facebook and there was a discussion about cream soups and someone mentioned finding a recipe for  Golden Mushroom Soup. I think I heard harps and the day became brighter so I new I had to make this and make it soon.


I started with the following ingredients:


Yummy, look at al those mushrooms!


My final product:


I am so happy to have this soup again. I couldn't wait to try it and compare it to the taste I had been missing. I pulled out a couple of pork chops, poured the soup over them and baked them slow until they were fork tender. Oh my goodness, was this soup good! I am no longer missing the stuff from the can. 


Rating the recipe: The first time I make a recipe, I tend to follow the recipe pretty much and if it is a canning recipe, I follow the directions for safety reasons. I made this recipe exactly as it was written and it is perfect as is. It does have the same taste as the can, but there is an additional layer of flavor that is missing from the can. I will definitely keep this on hand now. I found the recipe for this soup on the Chickens in the Road blog, a great blog to read and tons of recipes to try!

Monday, September 9, 2013

Pita Bread

I don't think I can say it often enough, but I love bread. I mean I really LOVE bread, all kinds too, especially if they are fresh out of the oven. I have been on this journey of making as much as I can from scratch and I have attempted many different types to satisfy my love of a good bread. Some have turned out better than others and I still need more practice to make things like hot dog and hamburger buns. For some reason, pita bread gave me some trouble the first time I tried to make it so I kept buying it from the store. Then a Greek restaurant opened up not too far from the house, and I loved eating their fresh pita bread. That spurred me to try again to make my own and I am so happy I did.


The amazing smell of bread baking always starts with the yeast proofing in a bowl.


I love getting to this stage too, my dough is getting ready to rise, I can still smell the yeast with the combination of flour and I know goodness will be happening soon!


After rising pita bread is formed into a long "snake"


then, cut into equal size pieces. I usually cut mine into 12 pieces, If you want larger pitas to make a wrap, you can cut the dough into 8 pieces. Any less and then the pitas almost get too big to work with. 


Each section is rolled into a ball and then flattened into a disk.


I bake on stoneware most all of the time and always when I am making pita bread. When baked, these puff up and turn golden and are so delicious and tender. 


And once again, I forgot to take a picture of my finished pitas! But here is a picture of a lunch a packed with my pita bread.


Here is my favorite bread book. Pretty much everything is in here and it has 500 bread recipes...I haven't made them all yet!

Wednesday, September 4, 2013

Peach Canning Continued


My first order of peaches I canned as peach slices and peach halves. When the second order came in, I got a little more creative. I made a peach vanilla jam, a peach rum sauce, peach  preserves, zesty peach barbecue sauce, peach butter, peach jalapeno jam and peach lemonade concentrate.

We both love peach anything so I do try and can a lot of those products. This year I went looking for some different recipes. I do think my favorite is the Peach Vanilla Jam. The added vanilla really adds a lovely smoothness to the deliciousness of those ripe peaches.

I found the recipe for the Zesty Peach BBQ Sauce in the Ball Complete Book of Home preserving and decided to make it after seeing so many people talking about it on some of the canning sites I read. The Ball book is my go-to canning resource, but they have lots of great recipes on their website too, including this one:


Zesty Peach BBQ Sauce


Makes about 8 (8 oz) half pints

Golden orange with red flecks, this barbecue sauce not only looks amazing, but tastes out of this world. Spoon some over your chicken or fish this summer!

6 cups finely chopped pitted peeled peaches (about 3 lb or 9 medium)
1 cup finely chopped seeded red bell pepper (about 1 large)
1 cup finely chopped onion (about 1 large)
3 Tbsp finely chopped garlic (about 14 cloves)
1-1/4 cups honey
3/4 cup cider vinegar
1 Tbsp Worcestershire sauce
2 tsp hot pepper flakes
2 tsp dry mustard
2 tsp salt
8 (8 oz) half pint glass preserving jars with lids and bands

Directions:

1.) PREPARE boiling water canner. Heat jars and lids in simmering water until ready for use. Do not boil. Set bands aside.
2.) COMBINE all ingredients in a large saucepan. Bring to a boil. Reduce heat and simmer, stirring frequently, until mixture thickens to the consistency of a thin commercial barbeque sauce, about 25 minutes.
3.) LADLE hot sauce into hot jars leaving 1/2 inch headspace. Remove air bubbles. Wipe rim. Center hot lid on jar. Apply band and adjust until fit is fingertip tight.
4.) PROCESS in a boiling water canner for 15 minutes, adjusting for altitude. Remove jars and cool. Check lids for seal after 24 hours. Lid should not flex up and down when center is pressed.

Wednesday, August 28, 2013

Beef Stew


I know I have been sharing a lot of canning recipes lately, but it is that time of year! I have been watching the weekly grocery store ads to see what meats are on sale and then trying to combine those sale items with in season items to plan my canning projects. I have a couple of goals in mind with this plan one of which is lowering my overall food costs. The other goal is to have a pantry full of foods that that have the convenience of processed foods, but that are better for me.

I love soups and like to have several kinds on hand. I have even been known to occasionally eat soup even for breakfast. Beef stew is a favorite and when I got my pressure cooker last fall, this was one of the first recipes I looked for. This recipe came from the Ball Book.

Lots of vegetables to chop:


I ended up with a 21 jars of soup, mostly pints, and a few quarts. I have found that the pint jars are perfect for single servings and are perfect to grab for lunches (or breakfasts) while the quarts make a great quick dinner for the both of us. I will serve with some homemade bread for a hearty dinner.


Monday, August 26, 2013

Tomato Skins


Waste not, want not, right? When I made my wing sauce last week, I had this lovely bowl of tomato skins left over and decided to dehydrate them and make tomato powder.


Loaded up ready for the dehydrator:


After drying for several hours:


After they were thoroughly dried, I put them in a blender and pureed the dry skins. Here is the powder that I ended up with:


What to do with tomato powder? I plan to add it in my dough the next time I make pasta. I stirred in some when I made ranch dressing the other day, just for a little change. The next time I make pita bread I might try it out in there. 

I love the fact that I was able to use something that would have just been tossed in the compost bin and made something that I can use in my cooking.

Tomato skins are pretty lightweight and when I removed the trays from my dehydrator I found some dry skins that had blown off the trays! 

Friday, August 23, 2013

Grape Vines, Memories and my Weekly CSA Box

For the past two weeks in my CSA box I have received some concord grapes. There are many foods that just taste like summer to me. Ice cold watermelon takes me back to my grandparents front yard under the big tree, a perfectly ripe peach or nectarine reminds me of my Dad, pulling out his pocket knife cutting off pieces to share with me. I could go on and on describing the taste of summer and the memories that are tied to those foods.

 Nothing however takes me back to my childhood summers quicker than a perfectly ripe, perfectly purple, concord grape. 

My Great-Grandmother had a grape vine and grew these at her house. My Uncle parked his boat beside that vine and my sister and I spend hours playing in that boat every summer reaching over the side of the boat and eating grapes. The vine grew up and over a post for easier picking and my sister and I spent a lot of time playing under there too, eating grapes and enjoying the shade provided by the vine.

Even though the vine was at my Great Grandmother's house and I shared grapes with many family members, and watched my Mom make grape jelly with those grapes, that taste reminds me of my sister more than anyone else.

A couple of years ago, my sister had gotten a cutting off of the vine and planted it at her house. Last year she had a great crop and I was in town when they were ready to be picked. It was fun picking grapes with her and her son, picking grapes off a vine that dates back to our childhood and probably even before our lives even had even begun. I don't know when the vine was originally planted.

Do you have any food memories that say summer to you?


On to the CSA box! This week we received corn, tomatoes, mini peppers, squash, cucumbers, potatoes, some cilantro, an onion and more of those delicious grapes. We also got a watermelon that I forgot to include in the picture.


I have said it before, but I am so glad with my choice of CSA providers. I love the variety of foods and everything has been so tasty. One thing that I have especially enjoyed is that occasionally we get a bag with some things grouped together to make something specific. This week it was a "salsa" kit and we have everything in there to make a batch of salsa. I am a huge fan of cilantro and like lots of it in my salsa.

Have a great weekend!

Wednesday, August 21, 2013

Wing Sauce


Last week I found myself with quite a few tomatoes that needed to be used soon. I didn't have enough to make a batch of spaghetti sauce, so I thumbed through my Ball book looking for a recipe that called for a smaller amount of tomatoes. I found the recipe for  Chicken Wing Sauce, and it was perfect since I had all the ingredients, I had enough of the right size jars and I love chicken wings!

After simmering all the ingredients for a while, I transferred it to the blender to puree the mixture.

I always forget how hot something like this is when it goes in the blender and it splashes up and burns the palm of my hand! I was quickly reminded of why I almost always use the immersion blender and blend it in the pot. I  don't burn myself with it and there are fewer dishes to wash, and I am all about not washing  dishes.


After pureeing, it still had to cook down for another hour or so before I could can it.


The instructions in the recipe stated you could add more hot sauce if you wanted more heat. I left this one a little on the mild size since I can always add more hot sauce when I open the jars, leaving it a little milder makes it a little more versatile. 


Kip wanted to know if I was planning to make a lot of wings in the near future. Everyone else that knows how much I can always asks the same thing too--how do I use all of my canned goods? I try and can a lot of basics that I can use in different ways. There will be chicken wings in the future, but this also makes a great marinade for almost any meat. A tablespoon or so added into a salad dressing is a nice touch and it also makes a great Buffalo Chicken Dip.

For a quick dinner last night, I cooked some chicken breasts, added the wing sauce after the chicken was fully cooked and let it simmer in the sauce for a couple of minutes. I removed the sauce from the heat and sliced it pretty thin and laid it on a bed of lettuce with some blue cheese crumbles and served with bleu cheese dressing. 

Monday, August 19, 2013

Garden Update


I thought I would give you a little update of my gardening attempts. We have been lucky enough to get a lot of  rain this summer so everything is  growing pretty lush.  The flip side of that though is that not a lot of my stuff has had enough sun to ripen very much. The pictures above and below show the raised bed that Kip built me for  my birthday and the fencing that my Dad added to act as a trellis for the beans and cucumbers. 

I have tomatoes in the front of the box and they are growing very well. Actually, I don't think I have ever had such big plants. I have had to re-stake these because the stakes that I had used for the past couple of years couldn't support the plants. They were just falling over almost as soon as I would stake them.  The new ones are much longer and I used some ties to anchor them better. 


These are a small cherry tomato and the first ones are just starting to ripen.


 My cucumber plants  are still blooming.  I love the little yellow  blossoms. 


A new cucumber, just starting to grow. It is a little less than an inch long here.


I love having my morning coffee sitting outside on the back patio looking out over my garden and yard. Even though we live in a neighborhood off of a main street, the backyard is still pretty peaceful. I love watching all the birds that visit, the bees and the butterflies too.  I can't name all the birds that come by, but I do recognize that I have several different kinds. After visiting with my grandparents a couple of weeks ago, and sitting on their porch watching all the birds that come to their bird feeders, I decided to set up an area in my yard too.