Wednesday, April 30, 2014

Quiche for the Freezer

I do like to have a variety of meals in the freezer for those nights I don't have time to cook or don't feel like cooking. I like to have at least three to four different meals in the freezer at one time so that I don't get tired of my "go to meal". I usually have a quiche or two in there because we both like them and served with a simple salad makes a nice meal.

Usually when I am cooking for the freezer, I cook one for dinner that night and one or two for the freezer. This particular quiche has ham, cheese and green onions in it, but I often just put in whatevr sounds good or whatever I have on hand.


I usually make my own pie crusts, but with quiche, or anything else that will go in the freezer for later I use the ones from the frozen section at the store. It make whipping these up even faster and they come in a pie tin so I don't have to remember to buy those.


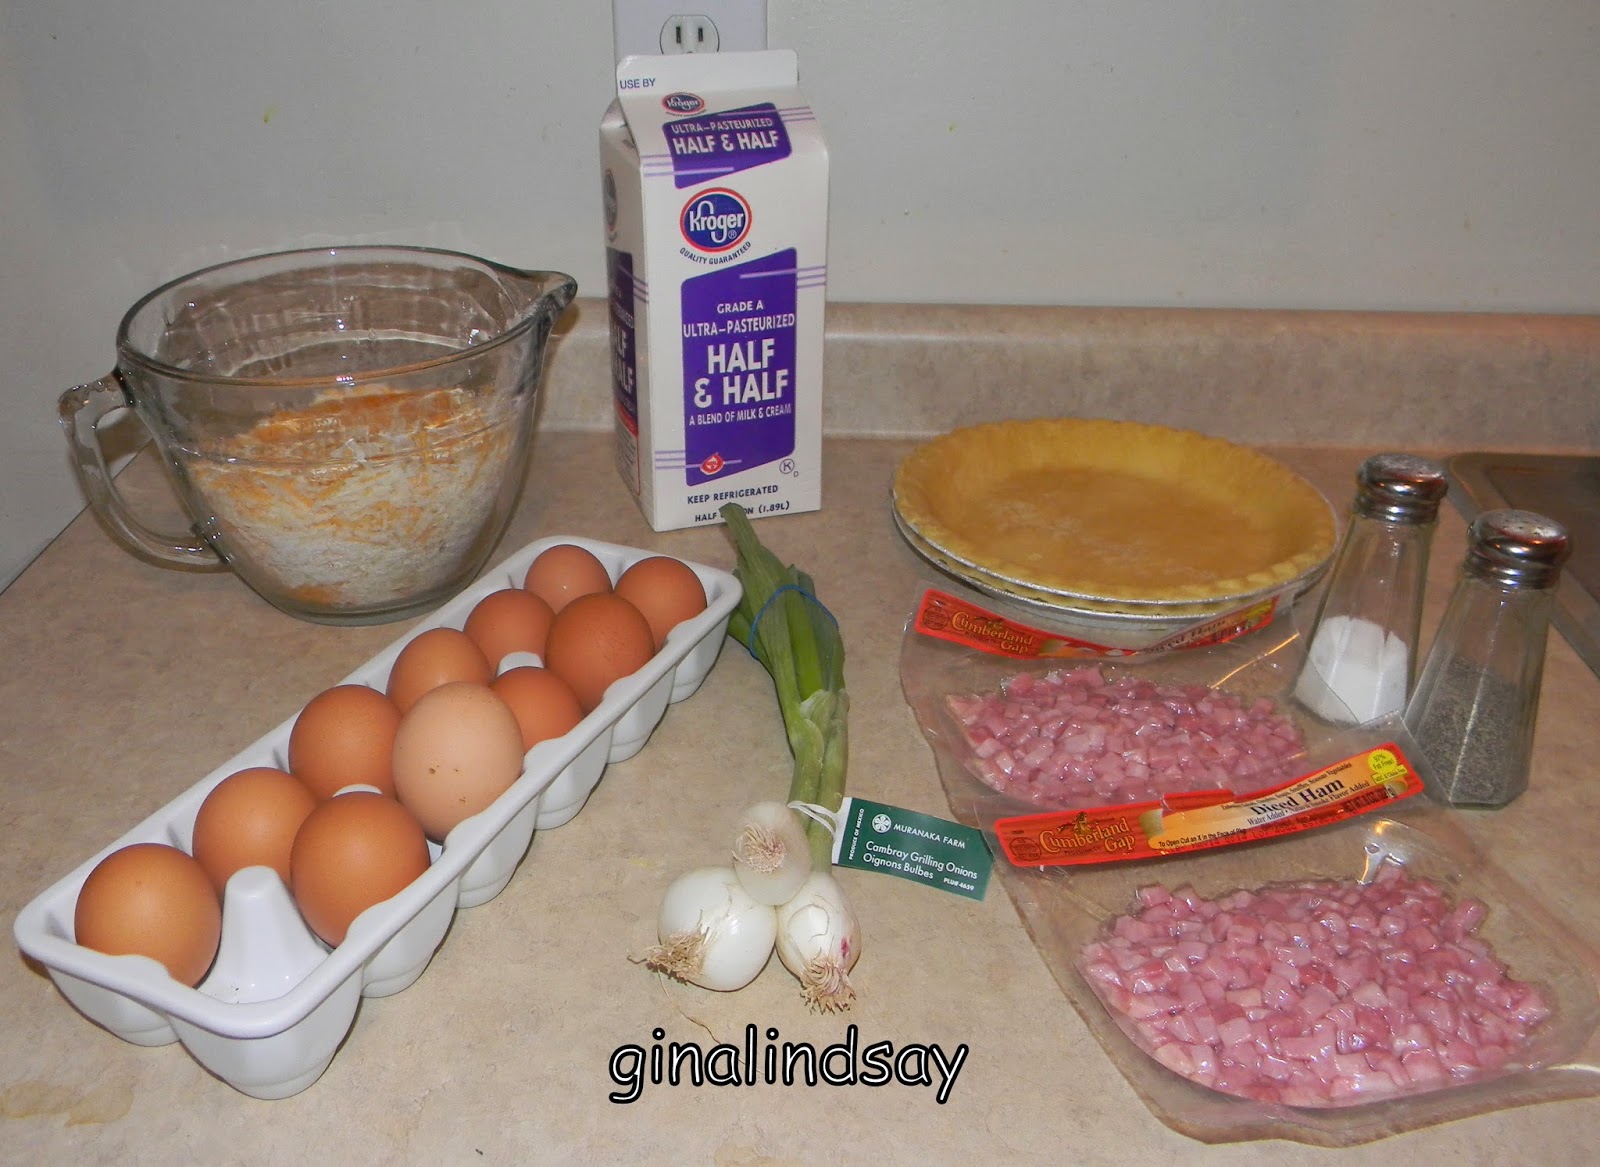
I sprinkle about a cup of cheese on the bottom of the crusts. I used a mix of sharp cheddar and Monterrey jack for this batch.


Then on top of that, I spread about a cup of diced ham.


In a bowl I will mix the eggs, cream, veggies, salt and pepper, and a small pinch of nutmeg.


After that is mixed, the egg mixture is poured into the shell over the ham and cheese. At this point, I will set the shells cookie sheet and stick them in the freezer for about an hour. After they are starting to freeze, I will pull them out and wrap them in foil. If I try and wrap them as soon as I mix them, I tend to make a mess getting the foil around the pie pan. Much less of a mess for me if I let it freeze a bit.


When I am ready to serve these, I will pull them out of the freezer the morning that I plan to use it and let it defrost in the fridge for at least a couple of hours. When ready to cook, I bake it in a 375 degree oven for about 35-40 minutes.


Basic Quiche

pie shell
1 cup cheese (a single cheese or a mixture)
3/4 - 1 cup of meat (ham, bacon, etc)
2 chopped green onions (or about a cup of  chopped veggies-broccoli, mushrooms or asparagus work great)
4 large eggs
3/4 cup half and half
salt and pepper to taste
pinch of nutmeg

Sprinkle cheese over bottom of pie shell. Top with ham or other meat. You can add veggies at this point, but if I am using green onions, I add them in the next step.

Mix together eggs, half and half, salt and pepper and pinch of nutmeg. Pour over the ham and cheese layers. 

If freezing; wrap in heavy duty foil and place in freezer. To cook let defrost for a bit then cook in a 375 degree oven for 35-40 minutes. 

If you want to bake it immediately, just skip the freezer part and bake for 35-40 minutes in a 375* oven.

Monday, April 28, 2014

Garlic Rosemary Focaccia

I enjoy baking breads, and even more than baking it, I love to eat a good bread. A couple of years ago, Kip gave me an Artisan Bread class for my Christmas gift. Even though I have been baking bread for a long time, I learned a lot in that class. One of the breads we made was a Garlic Rosemary Focaccia bread. I made this for dinner the other night along with a pot of Egyptian Lentil soup.

Getting ready to mix my dough! I used regular olive oil for the dough, but reserved the rosemary infused oil for the last step.


I love the smells from making bread and it starts at the very beginning when I proof my yeast.


After the dough was mixed, I set it aside to rise.


After the first rise, I kneaded the dough, adding in about a tablespoon of rosemary.


Second rise:


This is when I used the rosemary infused olive oil, just before baking. I also sprinkled a little more rosemary and some minced garlic.


And fresh from the oven:


I like this recipe for the Garlic Rosemary Focaccia. As great as any homemade bread smells when it is baking, the rosemary in this bread makes the house smell fantastic!

Monday, April 14, 2014

Extracts


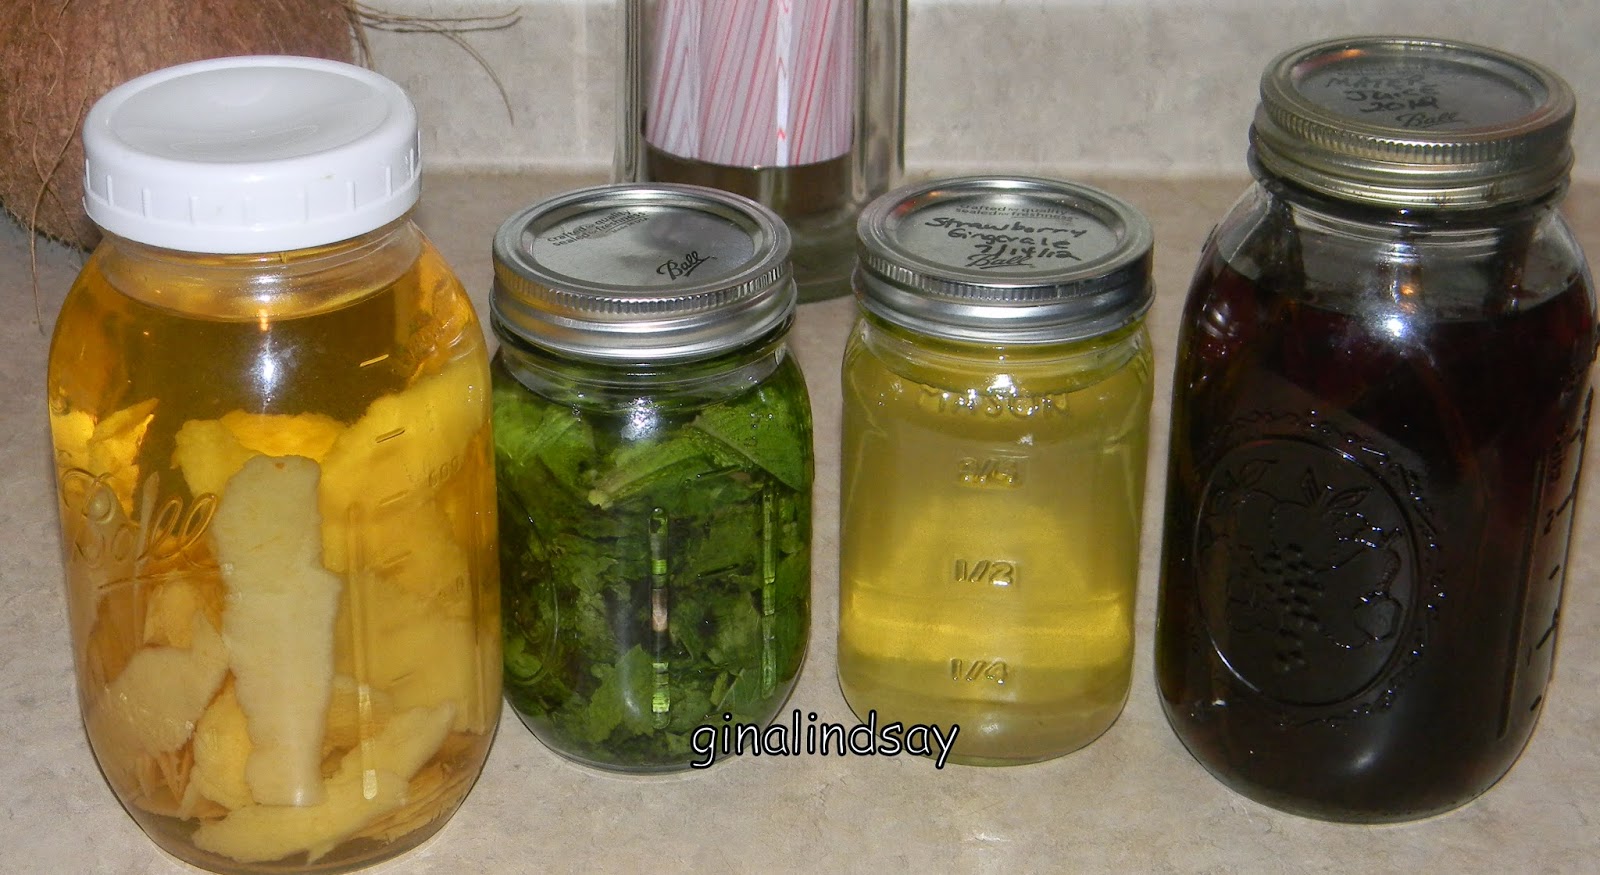
(from left to right: Lemon Extract, Mint Extract, Almond Extract, Vanilla Extract)

As with many other things I do in my kitchen, I found out how easy it was to make my own vanilla extract. I happily made my vanilla extract and excitedly checked every couple of days to watch the color change and darken. Ahh, finally I had my own extract to use in all of my baking projects.

And then like with everything else in the kitchen, I decided to see how many extracts t hat I could make on my own. I made almond next because I like it in a lot of cookie recipes.  I love lemon anything so that was next. I don't know why I thought I needed an entire quart jar of lemon extract, but that is what I made. Sometimes I get a little over excited in the kitchen. I see lots of lemon desserts in our future. I received quite a bit of mint in my Bountiful Basket last pick up and used part of it to make a mint extract. I was going to make some coconut too, but I ran out of vodka!

Vanilla extract I used 3 vanilla beans split and 1 cup of vodka. You can use bourbon or rum, but since I was making others around the same time, I stuck with the vodka.

Almond extract: I used 1/2 cup of sliced almonds that still had the skin per 1 cup of vodka. The almond extract that you buy in the store, I believe, is made with raw almonds,which are harder to come by. The extract is a little weaker than the one in the store, but this still has a lot of flavor.

Lemon Extract: I took three organic lemons and used a vegetable peeler to peel the outer layer each lemon and added vodka. 

Mint Extract: 1/2 cup of mint leaves to 1 cup of vodka.

I use the vanilla all the time and have been very happy with the taste. Last year for Christmas I made smaller bottles to give to some of my baker friends. I left one on my boss's desk and she called me to thank me and said "I think this is what heaven will smell like"! The bottles were a big hit.

Friday, April 11, 2014

Brussel Sprouts

I like Brussel  Sprouts. My husband doesn't care for them all that much. He will eat a couple of I make them, but I don't make them all that often since he doesn't like them. A few weeks ago we got some at the Bountiful Basket pickup so I went searching for a new recipe. The Food Network came to the recipe as they often do! I found this recipe from Sunny Anderson. I followed the recipe, with the following changes; I used a three peppercorn bacon, used an entire onion and I cooked the onions for about 10 minutes before adding the sprouts. By the time they were done the onions had started to caramelize a little.

I ended up with this dish:


And oh my, were they good! We both liked them and we both had seconds!

I know bacon makes everything better, but these exceeded my expectations!


I am fortunate that I have a husband that likes a huge variety of foods and he will try everything.  I do try new things all the time, some with better success than others, but he is a great sport about it. 

Wednesday, April 9, 2014

Butterscotch Pudding

This dessert happens to be one of my husband's favorite things in the world. I have never been a fan of pudding, with the exception of banana pudding, but he loves it so much that I like to make it for him occasionally. 

I just realized I took the picture without the milk and cream the recipe requires, so just pretend they are there!


The recipe doesn't call for the molasses, but does call for dark brown sugar and all I had on hand was light brown sugar. So I added a tablespoon of the molasses to the light brown sugar to make it dark brown sugar.

Brown sugar, cornstarch, salt, milk and cream are cooked together until it starts to cook.


When it thickens, it comes off the heat and one cup of the hot pudding is added to the egg yolks, and after that is combined it goes back in the pan, and back on the heat for just another minute or two.

It is removed from the heat at that point and the butter and vanilla are added.


I like to pour my pudding through the sieve so that if there are any lumps they are removed. And my pudding usually has a small lump or two, so this makes sure I have a smoother consistency.


Pudding is then poured into bowls and refrigerated. I cover the dishes with plastic wrap touching the surface to keep a thick skin from forming. 

Topped with some fresh whipped cream and I have a very happy husband!


Butterscotch Pudding

3 egg yolks, whipped together
1 cup packed brown sugar
1/3 cup cornstarch
1/4 tsp salt
2 1/4 cups of milk
3/4 cup of heavy cream
3 tablespoons of butter, cut into pieces
2 teaspoons vanilla extract

Combine brown sugar, cornstarch and salt in a saucepan. Add milk and cream; stir well. Cook on med heat, whisking continually until thick and bubbly. Remove from heat. Combine 1 cup of hot pudding to the egg yolks, stir well and then return to the pot. Return to the heat and cook for another 2 minutes, whisking the entire time. Remove for the heat and add the butter and vanilla. Stir to incorporate into the pudding. Pour into bowl or serving dishes and let chill.

Monday, April 7, 2014

Bountiful Basket and plans


This is what was in my Bountiful Basket this week. I usually try and pick out my favorite basket item, but this week that was too hard! I love cucumbers and carrots, and those little pepper make a great snack, I think those gorgeous artichokes might slightly edge out the others by just a bit. All I know is that we will be eating good at my house this week. 

How will I use these items in my meal plan for this week?

Artichokes: will be steamed and served with a garlic butter sauce as a side dish
Carrots, Cucumbers, Lettuce, and some of the Onions will be used in salads
Broccoli, some of the Carrots and the rest of the onions will be used in a Stir Fried Rice one night
Cauliflower will be eaten raw with hummus or some ranch dip
Sweet Mini Peppers will be used in salads, but I love these raw with hummus
Pears will be used in a Pear, Walnut Gorgonzola salad 
The melon, apples, bananas and the rest of the pears will be eaten as is with breakfast or lunches.

Friday, April 4, 2014

Really Can't Eat Just One of These!


In my quest for eating a real food diet, I decided I didn't have to give up eating everything that I like. I just  had to give up the overly processed versions. Basically, if I can cook it in my kitchen, I can eat it. I have since learned to make many of the things that I buy in bags and boxes.

I really like potato chips. Homemade chips are just amazing and very simple.

Potatoes, oil and seasoning.


Potatoes are sliced very thin using the slicer attachment for my Kitchen Aid mixer. I have also done these on a mandolin slicer, but the one I have currently doesn't get them quite thin enough. 


Potatoes are dropped into hot oil to simmer and bubble. I usually watch them pretty closely and remove them when the are golden brown.


I know some brands of potato chips on the market only have the same ingredients that I used, but then I have an entire bag of chips to eat. When I make them at home, I only make the amount that we will eat for dinner that night because they really are addictive.


My favorite way to eat them is at this point, when they are good and brown but before they burn. Yum!!

You can season them any way you want, these were seasoned with just seasoning salt, but you can a dd whatever seasonings you are in the mood for or happen to have on hand.

Wednesday, April 2, 2014

Soap Class

I have had this fascination of soap making for a long time. I have done several versions of the melt and pour variety, but really wanted to learn to do the lye based soaps. I have watched videos and read many manuals, but I really wanted to watch someone do it. Since lye is caustic and can potentially hurt me, I wanted to learn from someone that I could ask questions as I was going.

There is a new artists's center tht has recently opened near me and I noticed that they had a Primitive Soap Making class planned. Perfect! It was a great class, the instructor talked about the history of soap and soap making in addition to the process of making our soap. That made my inner nerd very happy since I have to know why and how something works.


Here is my soap poured into my mold after it had hardened:


And my block of soap after I peeled away the paper mold:


And my soap sliced and ready to dry:


We just made a basic lye soap, not adding any color or fragrance. Great class and I can't wait until they offer an advanced class.