Monday, April 29, 2013

Greek Chicken Lunch


Good Morning! I have a recipe and a lunch to share with you today. I have never been a huge sandwich fan so packing my lunch takes a little more though. Normally leftovers get reworked or packed directly into the next day's lunch. After we finish eating dinner, I go ahead and pack the leftovers in lunch containers. I am not a morning person and if I had to rely on getting my lunch packed before lunch it would never happen. Today's lunch is a dinner repeat: Greek Chicken, pita bread with some tomatoes and a cucumber ranch dressing, hummus and veggies for dipping. 


I am still looking for the perfect pita recipe, these were good, but I have made better. The cucumber ranch was family simple, I made a cucumber sauce, thought it was a little bland so I added some of the seasonings that I use to make ranch dressing.

Greek Chicken

Chicken breast, sliced very thin

1/2 cup olive oil
3 cloves minced garlic
1 teaspoon rosemary
1 teaspoon thyme
1 teaspoon oregano
1 teaspoon minced onion
1/2 teaspoon basil
1/2 teaspoon mint
1/2 teaspoon marjoram
juice from 2 lemons (or about 1/4 cup lemon juice)

Mix all ingredients in a large zipper bag. Press air out of the bag and squeeze until chicken is well coated. Marinate in the fridge for at least an hour up to 24 hours.

Cook in grill pan until chicken is thoroughly cooked.

Friday, April 26, 2013

Adventures with Pineapple


Last week a local store had whole pineapples on sale for $1 each. I love pineapple and canned pineapple is one of my go to fruits during the winter months when there isn't much fresh fruit available. I decided to can my own this year. I went to the store to pick up my pineapples and loaded 20 into my shopping cart. Let me tell you, if you buy that many pineapples at one time people will stare at you. Especially if that is the only thing in your cart! I have bought large quantities before but 20 pineapples is enough to completely fill the basket. I got a lot of stares, a few questions and then someone asked if they could come to my luau. I have found that when people are commenting they pretty much fall into a couple of categories:

1. They are experienced canners themselves and know why I have that much of one product.  
They are curious to see if I am making something that they don't know how to make or don't have a recipe for and sometimes they offer suggestions for things that I hadn't thought of, love talking to those people!

2. Sometimes they are new canners and they want to know how I am going to use it, or they are people that will tell me they want to learn how to can.

3. Some people are just curious!


I have never canned pineapple before. I only bought 20 so that I could see how long it was going to take me to process each pineapple. I learned that lesson after I bought all the citrus that took me forever to process. I had bought this hand little too last year on clearance and had yet to use it. It did make quick work of each pineapple. Each pineapple comes out cored and sliced. I just had to trim away a little bit sometimes on the top and the bottom slices.


The core stays in the pineapple along with some juice that I poured out and used as canning liquid. 


After seeing how long it took, I knew I could do more before the weekend was over so I went back for 20 more for a total of 40 pineapples. I ended up with 50 pint jars of pineapple chunks.


I also had enough left to dehydrate 9 full trays of pineapple slices. 


**********************
When I was a child I go go shopping with my Mamaw and was amazed that she always found someone to talk to no matter where we went, she would end up talking to someone. We always joked about it. Now I am that person :P. It is weird people will just start talking to me in stores or in waiting rooms. I am pretty shy and really never just start talking to people I don't know. Kip is amazed that he can go off for a bit and come back and I am talking to someone that is telling me all about their life. 

That always reminds me of my Mamaw and brings a smile to my face and my heart. It's just one of those times that I feel so connected to her, even though she has been gone for over 12 years. So I really don't mind people stopping me to talk, because I wonder if she had a hand in it and is laughing too.
************************


I found the pineapple tool at my local Kroger, but I have seen them in a lot of places that see a lot of kitchen gadgets such as  Bed Bath and Beyond.

Wednesday, April 24, 2013

Blue Cheese Dressing


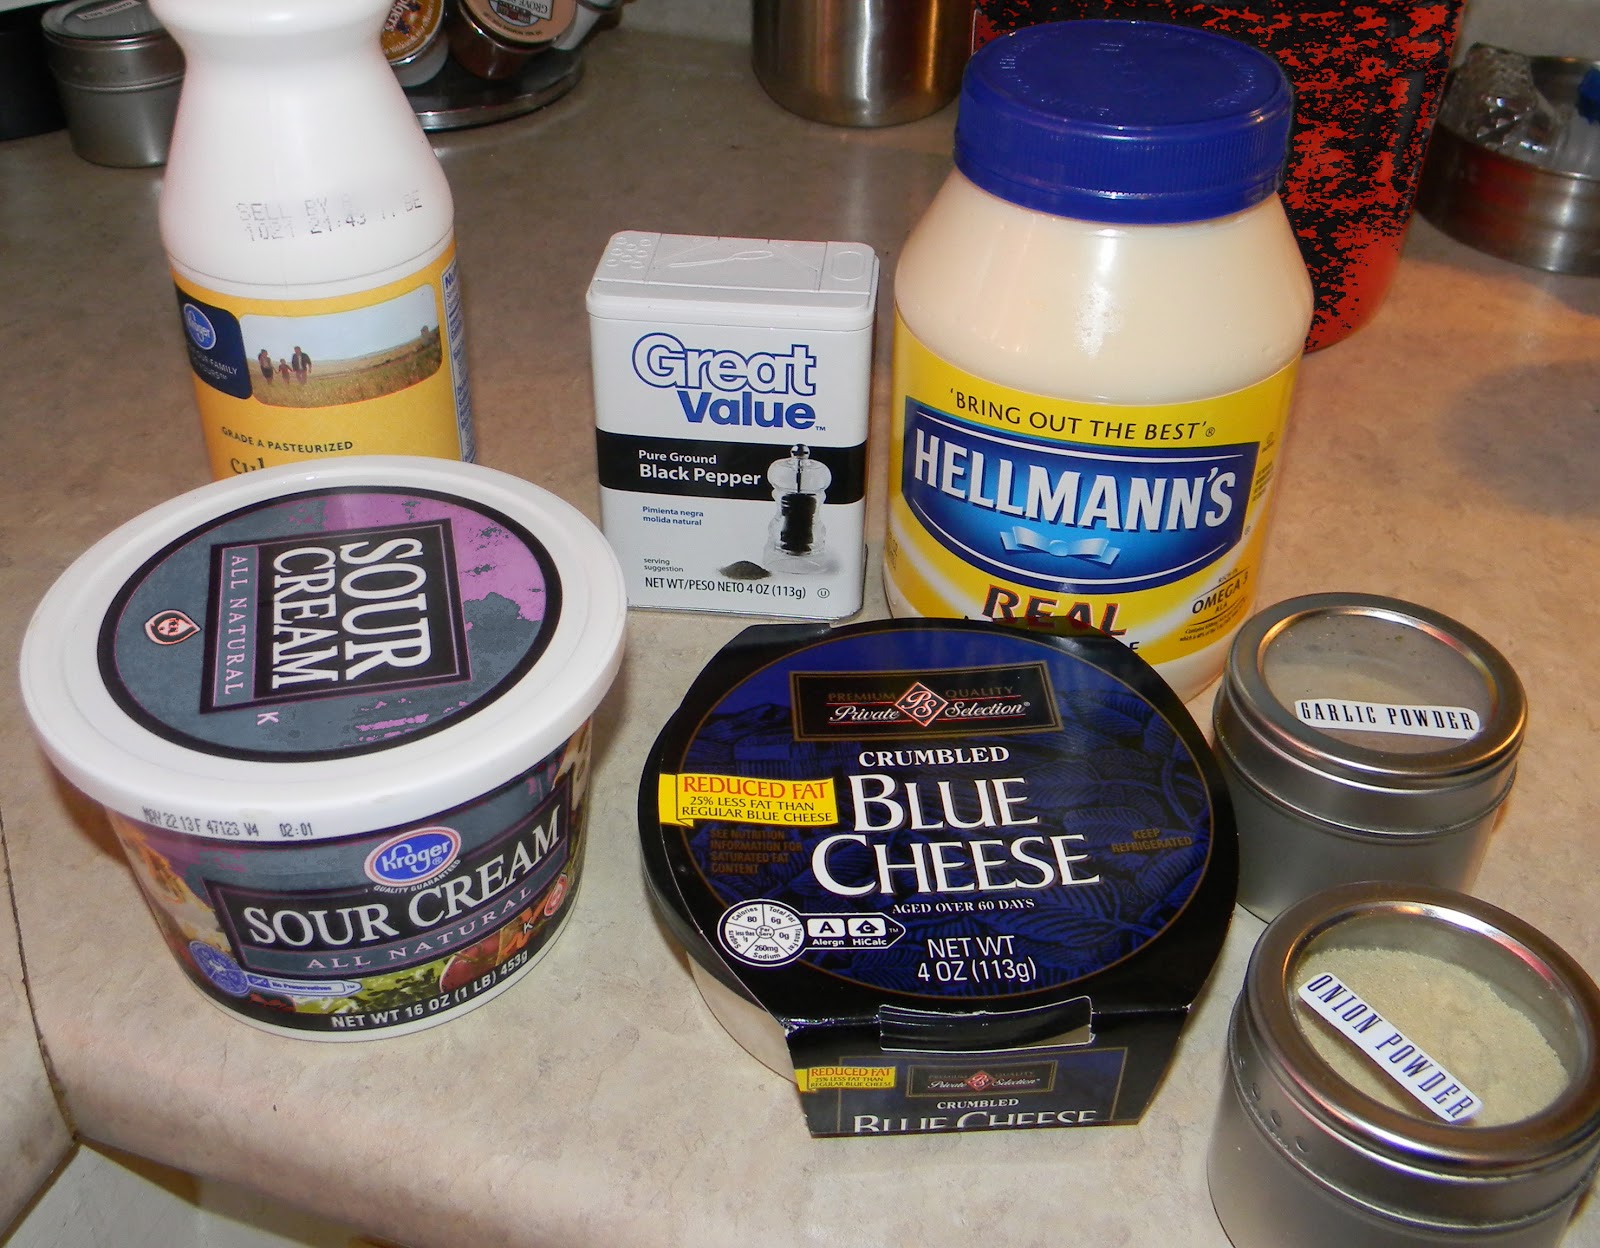
As were are trying to eat healthier, I have been looking for alternatives to a lot of things that I used to buy in bottles or packets. I make the marinades that I use, I have made a couple of different versions of mustard, steak sauce, dipping sauces and seasoning mixes. I have several new dressing recipes that I alternate making but I believe this blue cheese dressing is a favorite for both of us. It takes less than a minute to mix together and can be eaten immediately, but is even better if you let it sit for 30 minutes or so before serving. I make the dressing as I am starting dinner prep so by the time we are eating it has been mixed for at least 30 minutes or longer.

Here is the recipe that I use:
1 cup mayo
1/4 cup sour cream
1/4 cup buttermilk (plus a little extra)
1/4 - 1/2 teaspoon onion powder
1/4-1/2 teaspoon garlic powder
1/4 - 1/2 teaspoon black pepper

2-4 oz. crumbled blue cheese

Mix all ingredients, except the cheese. After everything is mixed together stir in the cheese.


I store my dressings in pint jars. After I get all the dressing in the jar, I will add enough buttermilk to finish filling the jar, leaving enough room that I can still shake the jar.

I am working on learning how to make my own mayo, but I am not there yet. Sometimes it works, but it usually doesn't! 

Friday, April 5, 2013

Creamy Hummus and a Kitchen Fave


We love hummus at my house and I learned a basic recipe a while back. Today I am going to show you one of my favorite hummus recipes. I start with 1 can of white kidney beans, 1 can of chick peas (reserving some of the liquid), a couple of tablespoons of lemon juice, 3-4 garlic cloves, about a tablespoon each of cumin and sesame seeds.


Everything gets added to the food processor. I only add about half of the lemon juice though until after it is blended. As it is blending I will slowly add in some of the reserved liquid from the chickpeas. Continue to blend until you have a nice creamy hummus.


Using the kidney beans was a happy accident. One day I was making hummus and realized that I had accidently grabbed one can of chick peas and one of the kidney beans. I was cooking with Samantha that day and she was looking forward to making hummus. I decided to give it a go and was happy with the end product. I makes a very smooth hummus. 

Most hummus recipes use tahini and sometimes I do too. The store I shop at does not always have it and it is a little pricey so sometimes it just isn't in the budget. I will add some sesame seeds or sometimes a drizzle of toasted sesame oil. 

Hummus is very versatile and I make it pretty frequently to eat with pitas or as a dip for veggies.


My food processor is one of my favorite kitchen tools. I love it for making hummus like here, making pasta or other doughs and many many other things. There is a funny story about this though. I had never had one before, but I wanted one. I had a good blender and couldn't really justify the cost for something that I didn't know if I would use that often. The first Christmas after we were married, Kip evidently mentioned to his mom and sister that he was thinking of buying one as part of my Christmas. They let him know that most women would not appreciate a kitchen appliance for a gift. He thought different, and I am glad he did because I was very excited when I opened the box! If I had known how many different ways I could use it, I would have probably gotten once even sooner.

Have a great weekend!

Thursday, April 4, 2013

Some Easter Photos

 I thought I would share a couple of pictures take over Easter weekend. I ended up hosting Easter this year, which I absolutely love doing. I wish we had a slightly bigger dining room, but we make do. Since we are a little close around the table, I always serve the food buffet style which allows me to decorate the center of the table. I decided to go bright this year! I have lots of mix and match things that I can combine in different ways to have different centerpieces when I have people over. 

My everyday dishes are white and my china is also white with a platinum ring around the edge. I love table linens and the white dishes allow me to be a little more creative with my linens and centerpieces. I tend to buy napkins and napkin rings on sale or on clearance (well, really almost everything!) and I can buy whatever strike's my fancy instead of worrying about what matches my dishes. 


I have a small kitchen and if too many people are in there at one time, someone's toes will be stepped on, so I set up a table with appetizers out of the way of the kitchen. See I am a little crazy with all the white dishes! I absolutely love these smaller "tasting" dishes since they offer a little taste without ruining anyone's appetite. The cups on the left have some homemade ranch dressing in the bottom of the cup and then some chopped up veggies. The spoons on the right have a black olive, a green olive and a marinated mozzarella ball.

I forgot to take a picture of the actual food I cooked though!


 Saturday afternoon was spent dying Easter eggs. I have been dying eggs with Jenna and Samantha since I have known them, it is just part of our Easter tradition now. They still seem to have fun decorating their eggs and posing for photos.

It is serious work to make sure each egg is perfect!

 These were some of the ones without drawing and things on them.

I hope you had a great Easter too!


Tuesday, April 2, 2013

Biscuits


Making biscuits has been one of those skills that has eluded me for many years. Sometimes I would bake them and they would be okay. sometimes not so great but still edible. Since I couldn't always predict the results, I often relied on frozen biscuits. They were okay and more consistent. 

But then we started eating healthier and I started cooking everything from scratch. 

And I looked at the ingredients on the package of frozen biscuits and saw about 20 ingredients. I knew I was going to have to work on the biscuits or give them up. You can see above that my biscuits have three ingredients: flour, buttermilk and butter. 

A woman that I work with gave me some tips and now every batch I have made has been awesome.


I start with a couple of cups of flour and very cold butter. I slice the butter into small pieces and then cut it into the flour until you can no longer see the big pieces of butter. A very important tip here is to keep the butter cold and if you aren't sure if it is still cold enough, then you can set it back in the fridge for a few minutes before moving onto the next step.


Adding the cup of buttermilk.


It is very important to not over mix the dough. I only gently stir until the flour is moistened.


After it is mixed, I turn the slightly wet, sticky dough onto a floured surface. I will also add some flour to the top of the dough and pat it out.


Cut straight into the dough and pull straight out, do not twist the cutter.


I bake on a well seasoned stone with the biscuit edges slightly touching.

After they have baked, as soon as you pull them out of the oven, you can brush the top of each biscuit with melted butter.


Finally, when I make biscuits, we can eat them and more important, we can enjoy them!

Thursday, March 28, 2013

Tracking My Canning Projects


I wanted a way to keep track of my canning projects and decided to make my own canning journal. My goals were to have a central place where I could record what I was canning, a place to write down where I found the recipe so that I didn't have to search all my cookbooks, and to know how much of each type that I made. I thought it would also be a good idea to have a place to note when I finished a batch too. This system does not replace the dates on my jars at all. I wanted to know if I was making too much of somethings and to know how quickly I was finishing a batch so that I could adjust my canning going forward. For instance, this past summer, I got a little carried away with the blueberry jam and made a little too much. Next year I know I need to look for recipes to make more than blueberry jam. I didn't know how many pints of carrots to can either, and we will run out of them pretty quickly because I love them! 

I enjoy making altered journals but I give most of them away as gifts. A couple of months ago I was teaching a card making class at my local scrap book store and as soon as I walked in I saw this awesome canning related paper line. I sat my supplies down and quickly started grabbing some of it! I have enough left over to make a cover for my canning recipe binder too. The recipes I have found online, I print off and then add to a binder in protective sleeves.


The inside is just regular notebook paper and I have recorded all the information that I wanted to track. I hope this will help me in the coming years to stay organized and not end up with a shelf full of blueberry jam and not nearly enough carrots!

Friday, March 22, 2013

Future Food


Hopefully this summer the things you see in these pictures will be some of the food we will be eating in the coming year. I have struggled to go things in the past because my yard is so shaded that there is only a tiny portion of my yard that gets a lot of sun throughout the day. For the past couple of years I have be growing tomatoes, strawberries and herbs in pots on the patio. This year I was able to find a community garden and I was also able to get a plot in their garden for this coming year. My garden plot is 4' x 12'. I plan on using a lot of square foot  gardening resources to maximize what I can grow in this space. I was so excited to have a plot! The photo above shows what my area looked like before I did any work at all. 

If you aren't familiar with community gardens, they are a great idea. There is a gardening area set aside, in this case, on an empty lot on the property of a nearby church. People that live in the area can sign up to take care of individual plots. So far it has been a great way to meet new people who share a love of growing food. At the garden where I am at, there are some "community plots" that everyone helps take care of and everyone can participate in the harvesting. There is a community herb garden, one filled with strawberries, another with peas and one with flowers. We also have two plots that have been divided into thirds that are designated as children's plots and there are two more that are grown and donated to a nearby senior citizen's apartment complex. 


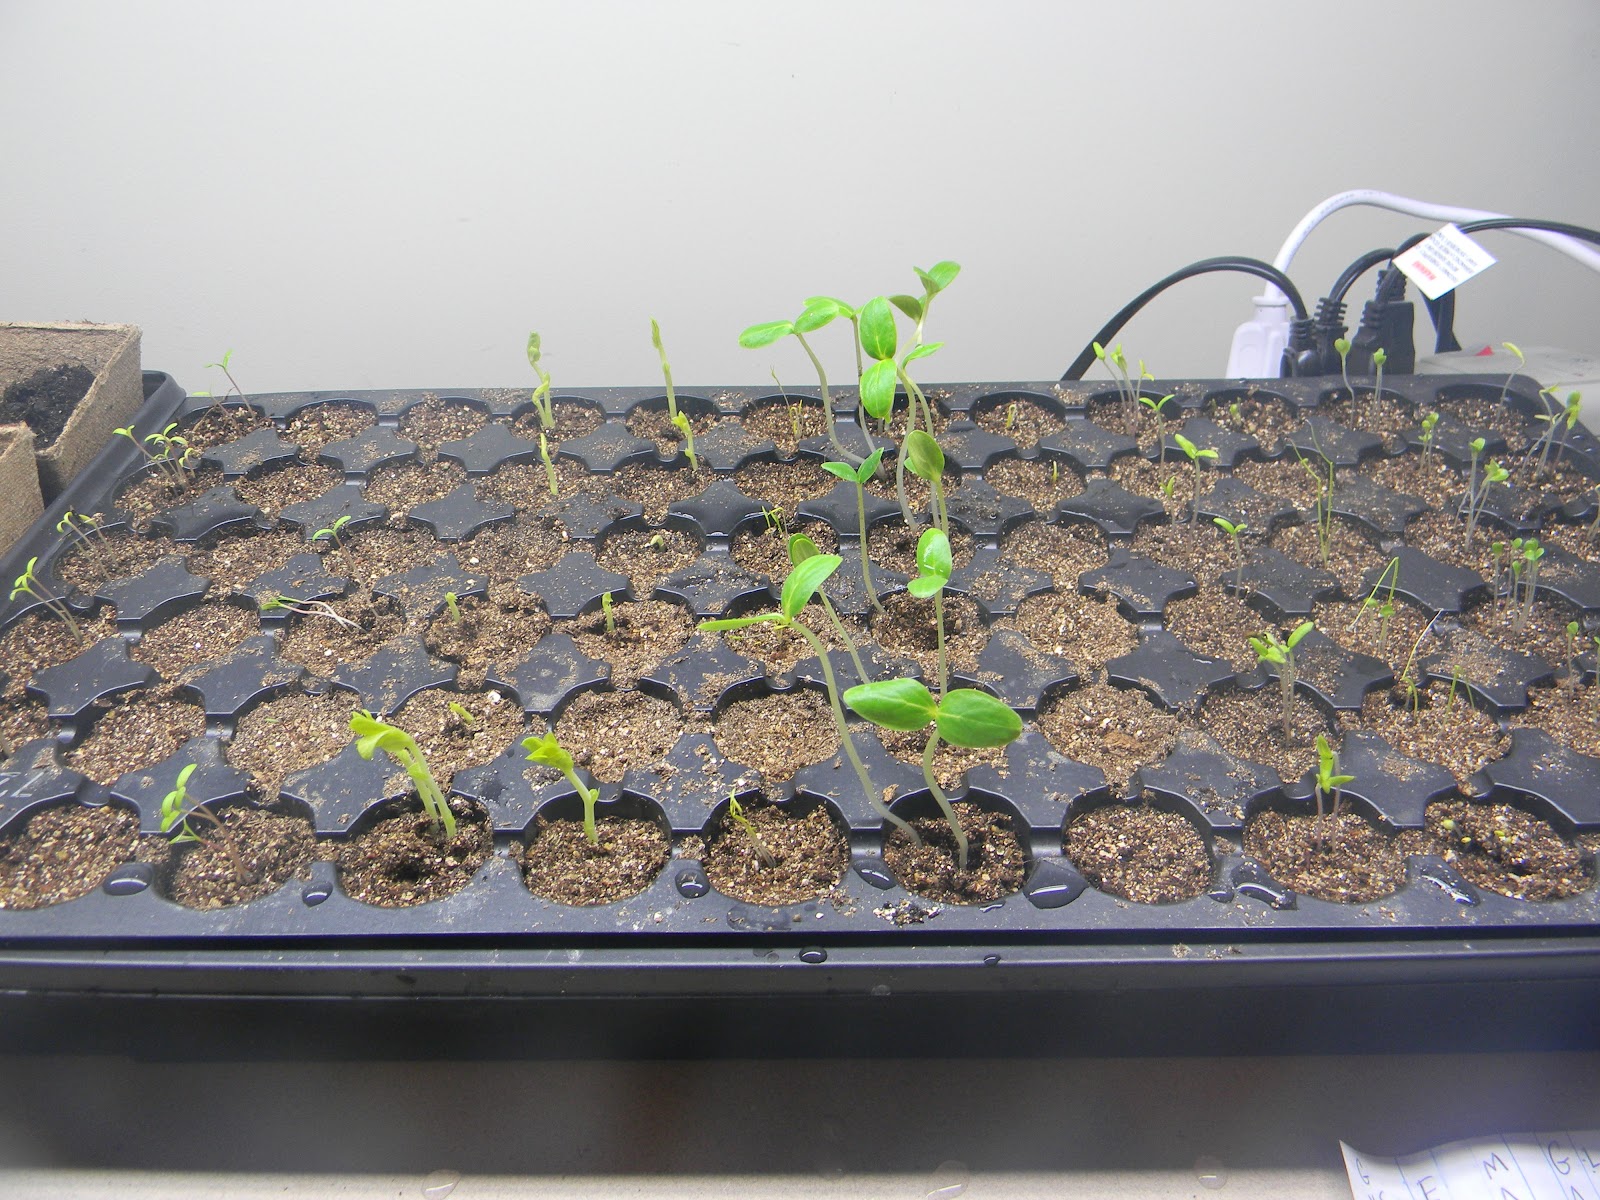
 This is the first year that I am starting my plants from seed. Normally I buy seedlings or in the case of my tomatoes, I get them from my Dad. All of my seeds are heirloom seeds purchased from either Baker Creek Heirloom Seeds or My Patriot Supply. I have one of those little greenhouse things that you can buy just about anywhere this time of year and I use it with a seed germinating mat and a grow light. Here you can see one of my plants about a day after it broke through the soil.


Here is my greenhouse starter minus the lid. At this point the cucumbers were starting to get too tall for me to use the lid. 


After they outgrew the greenhouse, I transferred them into these degradable cups. They are just waiting until it gets warm enough to go in the ground! They get several hours of light a day using the grow light. ***My markers were made with a cut up mini blind. We had one that the cats had broken and when we replaced it, I forgot to take it out on trash day then I saw this suggestion somewhere online. Great idea and one mini blind will last a long time!


This is the raised bed, rolling planter that Kip made for me last year. Since I have had multiple back surgeries, some days bending over can be difficult so he came up with this idea for me. I can sit on a stool and do whatever and not really have to bend over at all. This is in my back yard in the sunny spot of the yard. This picture is from last year where I grew some cucumbers, peppers and tomatoes. Even with the community garden plot, I will still be growing herbs, some tomatoes and a few other things her at home.


Tuesday, March 19, 2013

Dehydrated Citrus


I was able to buy a couple of cases of citrus on a bulk order a few days ago. I love citrus fruits and I was looking for several different ways of preserving what we couldn't eat before it needed to be eaten. I have made juice, marmalade, canned it in various ways and also decided to dehydrate some for later. I have more lemons in the dehydrator. Most of these will probably end up in tea at some point, but I would love to hear what you do with dehydrated citrus.

I am still loving my new Excalibur dehydrator. Deciding to buy one took me about two years of debating back and forth with myself. I knew I would use it and and it would be worth it in the end, but it was still a hard decision. I am happy to say that after a couple of months and many batches later that I have zero buyer's regret. In fact, after my first batch, when I saw how beautiful my dehydrated food was, I only wished I had gotten it sooner.

Friday, March 15, 2013

Kitchen Faves / Pi Day


I am back with another favorite item in my kitchen, actually, I think this one is more of a Kip favorite! I love kitchen gadgets of all kinds and would love to own everything if I had enough room for storage. Most everything I buy now can do more than one thing, I don't buy a lot of things that only have one purpose, especially if they are kind of bulky. One of the exceptions is this mini pie maker. 

Kip really loves dessert and I really didn't make it that often unless we were having company over or if we were going somewhere and taking food. One of the reasons was because if I made it we would definitely eat it, and eat all of it. With just the two of us in the house that was a lot of extra calories that we didn't need. So I started searching for some recipes with a smaller yield. Even if I am making dessert from scratch with real food ingredients, I really don't have much need to have 36 cupcakes at a time. 

I saw this pie maker on sale one day and kind of on impulse purchased it. Kip was pretty skeptical at first, mainly because it only does one thing and it is one more piece of equipment that needed to be stored in my already overstocked kitchen. I won him over the first time that I made an apple pie for dessert. By the second time he had a pie for dessert, he was a huge fan.


This fall when apples were coming into season I canned several jars of apple pie filling to have on hand. I almost always have a pie crust in the freezer so if I need a quick dessert, all I have to do is pull out the crust, roll it out, pour in a jar of pie filling and pop it in the oven and I am good to go. I canned this pie filling in both quart jars for a full size pie and in pint jars for making mini pies or serving over ice cream.


 One thing I like about this set too is that it came with that black cutter. The larger side cuts the perfect size for the bottom crust and the other side cuts the top crust. 


Here are my finished pies. A lot of the time I only make one for each of us, but I decided to make one for lunches today too. Yesterday was Pi Day (3/14) and I knew my geeky husband would appreciate getting an apple pie for dessert!

The pie crust recipe that I use and keep in the fridge can be found here. I have used several over the years and I like this one because it isn't sweet so I can use it for savory pies too, not just dessert. I really like that it makes three crusts. They store well in the freezer and it's great to have them already made if I need them. 

Have a great weekend!